| Materials | Tools | |||||
|
|
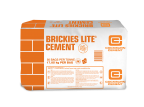
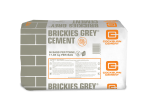


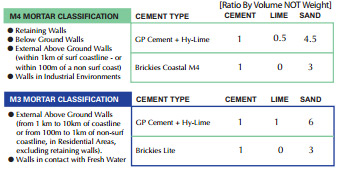
Our Bricklaying products provide you with a perfect blend of Cockburn Cement and Hylime (builders hydrated lime) that conforms with an M3 Australian Standard classification. All that you need to do is add the sand and the water.
For estimating your requirements please refer to our easy estimator or try our calculator located in the side panel.
Check out our Home Builders Guide where we have listed the best products available in WA and where to use them for the best result.
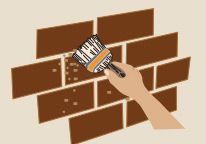
See below for our step-by-step guide to laying bricks; alternatively you can download our printable copy here:
![]()
-
1
Brickwork Basics
The principal function of mortar is to develop a complete and durable bond between masonry bricks, binding them into a single element. The mortar should be strong enough to withstand compressive and lateral forces and it must create a water resistant barrier.
The strength of the mortar is important, whilst it needs to be strong, it needs also not to be too strong. If the mortar is too strong and settlement occurs, the bricks will crack and it is much easier to repair mortar than to replace bricks.
Cockburn Cement has developed several different cement and mortar products to make your brick laying experience easier and more consistent. See “Mixing Mortar” for details of our products.
-
2
Setting out Brickwork
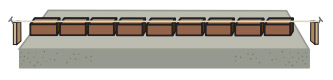
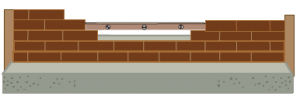
Assuming that the brickwork is being built on a levelled concrete footing, lay out a course of bricks, without mortar, along the foundation. The bricks should be laid around 10mm apart to allow space for your mortar. This will determine the number of bricks per course.
Having done this set a tall stake at each end of the wall and then run a string line between the two stakes to give you the exact line of the wall face. Take your time, as this process will determine the straightness of the wall.
-
3
Mixing Mortar
Firstly we need to determine what type of mortar you require. We need to determine the effect that the environment will have on your wall. Using the following guide will help.
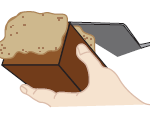
When mixing mortars by hand, measure the quantities carefully using the same gauge vessel for all ingredients. Mortar should be mixed on a hard flat surface (concrete slab or a board) or in a cement mixer. Firstly combine all the dry materials, mixing them until the colour is uniform. Add a little water at a time to the mix and continue to mix the mortar. Never add large quantities of water as the mix will become too runny and difficult to work with. The mortar needs to end up in a soft-putty-like state able to stand on it’s own yet spreadable with a trowel. Mix only enough mortar that can be used in approximately 40 minutes. Do not add additional chemicals to the mix without first following the manufacturing guidelines.
-
4
Laying Bricks
Remove the dry blocks from the footing and spread a layer of mortar about 10mm thick along the footing to the length of about 5 bricks.
Place the corner/end brick in place squarely up against the string line. Tap this brick down with the trowel handle bedding it into the mortar.

 All subsequent blocks will require buttering, which means that you need to spread 10mm of mortar onto the side end of the brick.
Place these bricks gently in line with the previous bricks, up against the string line. Tap the brick down to line up level with the previous brick; ensuring it has a firm bed in the mortar, similarly, it is firmly joined to the adjacent brick.
When the course is half laid, begin working from the other end, working carefully and keeping the bricks against the string line, continue until only one brick remains to be laid.
Cut the brick to size using the brick bolster if required. Butter both ends and gently put into place.
As each course is complete clean off excess mortar with your trowel so that it is flush with your bricks. Do not apply a finish to the joints straight away, as the mortar will be too wet.
After each course is laid lift the string line up the stakes for the next level to begin.
After the first course is laid, the usual practice is to build up both ends first. This is done to ensure that the finished wall is straight and level. Never build the ends up more
 than 1.2m before filling in the middle. Use your spirit level very frequently to ensure that the wall stays level and true, the last thing you want is to have to pull your wall down and start again.
 -
5
Finishing Brickwork
When the mortar has turned quite firm, take your finishing tool and apply gently pressure to the mortar while moving the finishing tool up and down all of the mortar joints, take care to apply equal finishing to all areas so as to create a well finished even look to the entire wall.
Always clean excess mortar and splashes from the face of the wall as you go along. A soft brush will do, and it is easier to do before the mortar has set than later, were a wire brush or diluted Hydrochloric Acid solution will be required.